
From idea to make
Wooden Laser Cut Vehicle Maker: Design Your Next Model
Turn a small wooden vehicle into your next creative build. Choose a model, personalise its details and inspect the parts and assembly before exporting your design.
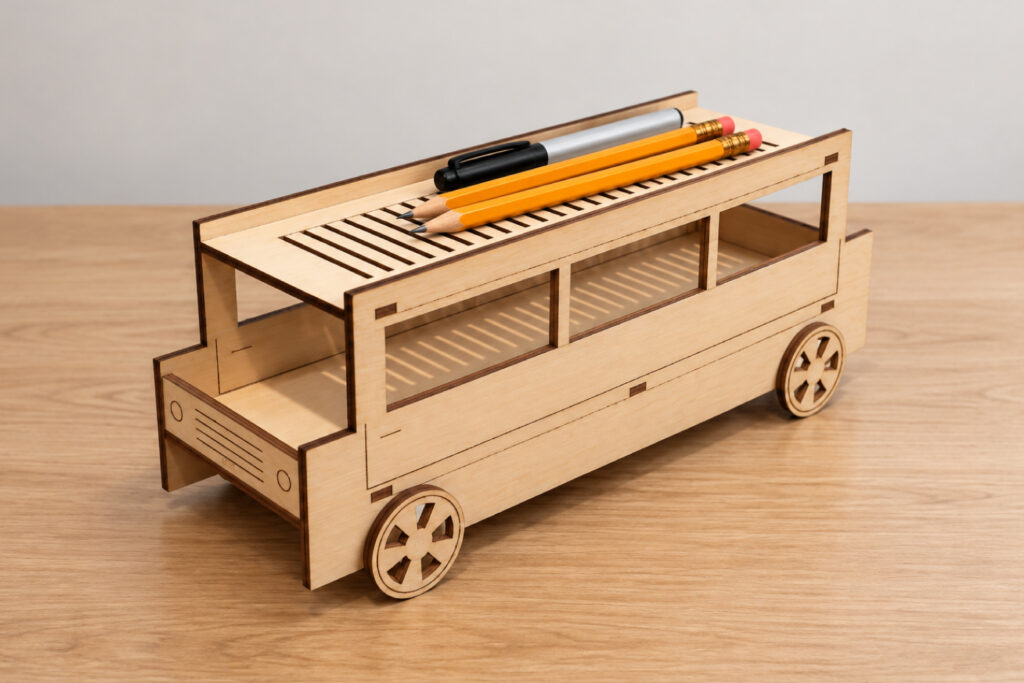
About This Tool
Bring miniature vehicles to life with the Aqua Artistry Creations Wooden Laser Cut Vehicle Maker.
This free creative tool is designed for laser crafters who want to create fun wooden vehicle projects for laser cutting without having to draw every component manually from scratch.
Use the maker as a starting point for creating cars, trucks, buses and other vehicle-inspired craft projects that can be cut from wood or another suitable laser material and assembled into dimensional creations.
Whether you’re making a decorative vehicle for a child’s room, a personalized gift, a shelf sitter, a miniature model or simply experimenting with laser-cut construction, the Wooden Laser Cut Vehicle Maker makes the design process easier and more enjoyable.
Instead of spending time manually constructing wheels, bodies, windows and other basic vehicle components in vector software, makers can concentrate on choosing a design, preparing the pieces and turning them into a finished physical project.
The finished vehicles can be left with a natural wood appearance or personalized with paint, engraving, names, numbers, patterns and additional decorative details.
What Can I Create?
The Wooden Laser Cut Vehicle Maker is ideal for creating projects such as:
- Wooden laser cut cars
- Toy-style vehicles
- Pickup trucks
- Delivery trucks
- School buses
- Vans
- Construction-inspired vehicles
- Racing cars
- Vintage vehicle decorations
- Farm vehicles
- Emergency vehicle decorations
- Miniature transportation models
- Children’s room decor
- Nursery decorations
- Shelf sitters
- Personalized name vehicles
- Birthday gifts
- Father’s Day gifts
- Transportation-themed party decor
- Classroom decorations
- Craft fair products
- Miniature wooden models
- DIY vehicle collections
You can also create several different vehicle designs and display them together as a miniature transportation collection.
How to Use the Wooden Laser Cut Vehicle Maker
The tool is designed to give makers a simpler starting point for creating dimensional wooden vehicle projects.
Step 1 – Choose Your Vehicle Design
Start by choosing the type of vehicle you’d like to create.
Think about the final project before selecting your design.
For example, you might want to make a:
- Car
- Truck
- Bus
- Van
- Utility vehicle
- Vintage vehicle
- Toy-style vehicle
Choose a design that suits the person, occasion or display you’re creating it for.
Step 2 – Explore the Available Design Options
Browse the available vehicle designs and choose a starting style.
Pay attention to the overall silhouette as well as individual components such as:
- Vehicle body
- Wheels
- Windows
- Roof
- Front and rear sections
- Decorative details
For laser cutting, a clean design with strong connected pieces will usually be easier to cut and assemble.
Step 3 – Customize Your Project
Use the available options in the maker to create the vehicle design you want.
Depending on your project, you can also plan additional personalization after exporting the design.
For example, you could add:
- A child’s name
- Family name
- Number
- Initials
- Business logo
- Racing number
- Short message
- Decorative engraving
Small personalized details can turn a simple wooden vehicle into a unique handmade gift.
Step 4 – Choose the Finished Size
Decide how large you want the completed vehicle to be.
Smaller vehicles are excellent for:
- Shelf decor
- Tiered trays
- Miniature displays
- Ornament-style projects
Larger vehicles can work better as:
- Children’s room decorations
- Shelf sitters
- Table decor
- Personalized gifts
- Craft fair products
When resizing dimensional projects, always consider the thickness of small components and connection areas.
Step 5 – Choose Your Material
Select a suitable material for your laser machine.
Popular materials for wooden vehicle projects can include:
- MDF
- Basswood
- Birch plywood
- Craft plywood
- Hardwood plywood
- Other laser-safe craft wood
The material you choose can significantly affect both the appearance and assembly of your finished vehicle.
A natural plywood finish can create a classic wooden-toy appearance, while painted MDF can produce bright and colorful craft projects.
Step 6 – Check Your Material Thickness
For dimensional projects, material thickness matters.
Material advertised as a particular thickness may not always measure exactly the same in reality.
If your vehicle design includes pieces that connect or slot together, measure your actual material with digital calipers before cutting whenever possible.
This can help prevent connections that are either too tight or too loose.
Step 7 – Review the Vehicle Before Cutting
Take a moment to inspect the finished design.
Look for areas that could become fragile after cutting, particularly around:
- Thin wheel supports
- Narrow windows
- Small decorative elements
- Sharp corners
- Small connecting areas
If you’re producing a small vehicle, simpler details will usually produce stronger results.
Step 8 – Prepare Your Cutting File
Once you’re happy with your vehicle design, use the available export or download workflow and prepare the file in your preferred laser software.
Before sending the project to your machine, check:
- Overall dimensions
- Cutting lines
- Duplicate lines
- Material settings
- Placement on the material
- Scale
- Small details
Always confirm the final size before cutting.
Step 9 – Make a Test Cut
If you’re using a new material or creating the vehicle at a significantly different size, consider making a test cut first.
You don’t necessarily need to cut the complete project.
Testing a small section or connection can help determine whether your settings and material thickness are suitable.
This is especially helpful for projects containing interlocking pieces.
Step 10 – Cut the Vehicle Pieces
Place your chosen material into your laser machine and use appropriate settings for that specific material.
Laser power, speed and number of passes will vary depending on:
- Machine type
- Laser power
- Wood species
- Material thickness
Always follow the recommendations for your machine.
Step 11 – Dry-Fit the Vehicle
Before using glue, assemble the pieces without adhesive.
This is called a dry fit.
It allows you to check:
- Component alignment
- Wheel positioning
- Connection points
- Overall structure
- Final appearance
It’s much easier to correct a problem before the pieces have been permanently glued together.
Step 12 – Paint or Finish the Pieces
If you’re planning to paint the vehicle, it may be easier to paint some components separately before final assembly.
You can experiment with:
- Acrylic paint
- Wood stain
- Natural wood finish
- Paint markers
- Engraved details
- Multiple wood tones
For children’s room decor, bright contrasting colors can work beautifully.
For farmhouse or vintage decorations, natural wood, muted colors or distressed finishes can create a completely different appearance.
Step 13 – Assemble Your Wooden Vehicle
Once you’ve confirmed that all components fit correctly, assemble the vehicle.
Apply an appropriate amount of wood or craft adhesive where required.
Keep the pieces aligned while the adhesive sets.
Avoid applying too much glue because excess adhesive can squeeze out around the joints and affect the finished appearance.
Step 14 – Add the Finishing Details
Once assembled, make the project your own.
Consider adding:
- Names
- Numbers
- Engraving
- Decorative headlights
- License plate details
- Painted windows
- Layered wheels
- Business branding
- Seasonal decorations
A simple design can become completely different depending on how you finish it.
Tips for Better Laser Cut Wooden Vehicles
Keep Small Parts Strong
Avoid reducing a complex vehicle design too much.
Small wheels, narrow connections and thin decorative sections may become fragile when cut at very small sizes.
For miniature projects, simplify the design whenever necessary.
Measure Your Material
For dimensional or slot-together projects, measuring your actual sheet thickness can save a lot of frustration.
Even materials sold under the same listed thickness can vary slightly.
Test Before Cutting Multiple Vehicles
If you’re creating several vehicles for gifts, craft fairs or decorations, cut and assemble one complete sample first.
Once you’re satisfied with the result, produce the remaining pieces.
Paint Before Assembly When Helpful
Detailed areas can be much easier to paint while the pieces are still flat.
You can then assemble them after the paint has completely dried.
Use Contrasting Layers
Layering natural wood with painted elements can add depth to the design.
For example, combine:
- Natural body + dark wheels
- Painted body + natural wood trim
- Light wood + darker engraved elements
Create Collections
Don’t stop at one vehicle.
Create several vehicle styles and turn them into a themed collection for:
- Children’s rooms
- Transportation-themed nurseries
- Classroom displays
- Playroom decor
- Craft fairs
- Gifts
Frequently Asked Questions
What can I make with this tool?
You can create wooden vehicle-inspired projects for laser cutting, including cars, trucks, buses and other transportation-themed designs.
Finished projects can be used as shelf decor, children’s room decorations, personalized gifts, miniature models, party decorations, craft fair products and DIY wooden collections.
Is the Wooden Laser Cut Vehicle Maker free?
Yes. The Aqua Artistry Creations Wooden Laser Cut Vehicle Maker is 100% free to use.
You can experiment with vehicle designs and create ideas for your laser craft projects without needing to draw every component manually.
Is this tool suitable for beginners?
Yes.
The tool is designed to simplify the vehicle-design process so makers don’t need advanced vector-design experience just to get started.
Beginners should start with a simple vehicle and familiar material before experimenting with more detailed designs.
What materials can I use?
Common laser-crafting materials include:
- MDF
- Basswood
- Birch plywood
- Craft plywood
- Other laser-compatible woods
The correct material depends on your laser machine and the requirements of your particular project.
Always make sure your material is safe for laser cutting.
Can I use acrylic?
Some vehicle projects may also be suitable for laser-compatible acrylic.
However, the material should be appropriate for both your machine and the construction of your particular design.
Never cut materials that aren’t approved for use with your laser.
Can I resize the vehicle?
Yes, but use caution when resizing dimensional laser-cut projects.
Making a vehicle significantly smaller can cause previously strong sections to become very thin or fragile.
If the design includes slots or connections based on material thickness, simply scaling the complete design can also affect the fit.
Always inspect and test the project after major size changes.
Why does material thickness matter?
If the vehicle contains interlocking pieces, the dimensions of those connections may depend on the thickness of the material.
For example, a sheet sold as 3 mm plywood may measure slightly above or below 3 mm.
Even a small difference can affect how tightly components fit together.
How should I measure my wood?
Digital calipers are one of the easiest ways to measure sheet material accurately.
Measure the actual material you intend to cut instead of relying entirely on the manufacturer’s listed measurement.
Should I glue the pieces immediately after cutting?
It’s better to dry-fit the complete vehicle first.
Assemble the components without adhesive and check that everything fits and aligns properly.
Once you’re satisfied, take apart any sections necessary and complete the final assembly with suitable adhesive.
Can I paint my wooden vehicle?
Absolutely.
Painting is one of the easiest ways to turn the same basic vehicle design into many different projects.
You can use different colors for the:
- Body
- Wheels
- Windows
- Roof
- Trim
- Decorative layers
You could also keep some parts natural wood for contrast.
Should I paint before or after assembly?
Either approach can work.
Painting before assembly is often easier when individual pieces have different colors or contain areas that will become difficult to reach later.
Painting after assembly may be more convenient for simple single-color projects.
Can I engrave details onto the vehicle?
Yes. Additional engraving can be a great way to personalize a wooden vehicle.
Consider adding names, numbers, windows, logos, decorative lines or small personalized messages in your preferred design software.
Can I make personalized children’s gifts?
Yes.
A wooden vehicle with a child’s name or initial can make a fun personalized birthday, nursery or bedroom decoration.
For children’s projects, remember that decorative laser-cut craft items are not automatically toys. Small components and materials may present hazards, so projects intended for play need appropriate construction and safety consideration.
Can I create shelf sitters?
Yes.
Wooden cars, trucks and buses can work particularly well as laser-cut shelf sitters.
Create a single vehicle or build a matching collection for a shelf, nursery, playroom or transportation-themed room.
Can I make a vehicle collection?
Definitely.
Try creating several different styles and placing them together as a coordinated collection.
For example:
Car + Pickup Truck + Bus + Van
Using the same wood, colors and finishing style will help the entire collection feel consistent.
Can I make seasonal versions?
Yes.
A vehicle design can be adapted to many seasonal craft ideas.
For example:
Christmas: Add a tree, presents or festive engraving.
Halloween: Use spooky colors, pumpkins or themed decorations.
Valentine’s Day: Add hearts and personalized names.
Back to School: Create a school bus-inspired decoration.
Father’s Day: Personalize a truck or car design with a name or message.
This makes vehicle designs useful throughout the year.
Can I sell projects made with the tool?
Before selling finished products or distributing any resulting digital files, check the current Aqua Artistry Creations License Terms for the permissions that apply to your use.
Do I need expensive design software?
You don’t need professional vector-design experience to begin using the maker.
For additional personalization, you can always bring your resulting design into the software you normally use with your laser machine.
What laser machines can I use?
The project workflow can be suitable for many laser cutters, provided the exported design format is supported by your software and your chosen material is compatible with your machine.
Always verify dimensions and settings in your laser software before cutting.
What’s the best way to get a clean finished result?
For the best results:
- Measure your material.
- Check the final dimensions.
- Inspect thin sections.
- Make a test cut when necessary.
- Dry-fit all components.
- Sand or clean edges if needed.
- Paint or finish the individual pieces.
- Complete the final assembly.
Taking a little extra time before gluing usually produces a much cleaner finished vehicle.
Start Creating Your Own Wooden Vehicles
Turn a simple sheet of wood into something dimensional and creative.
Use the Aqua Artistry Creations Wooden Laser Cut Vehicle Maker to explore vehicle designs, prepare your pieces and create wooden cars, trucks, buses and other transportation-inspired craft projects.
Create one personalized vehicle or build an entire collection — then paint, engrave and decorate each project to make it completely your own.
Choose a vehicle. Cut the pieces. Assemble your creation.